

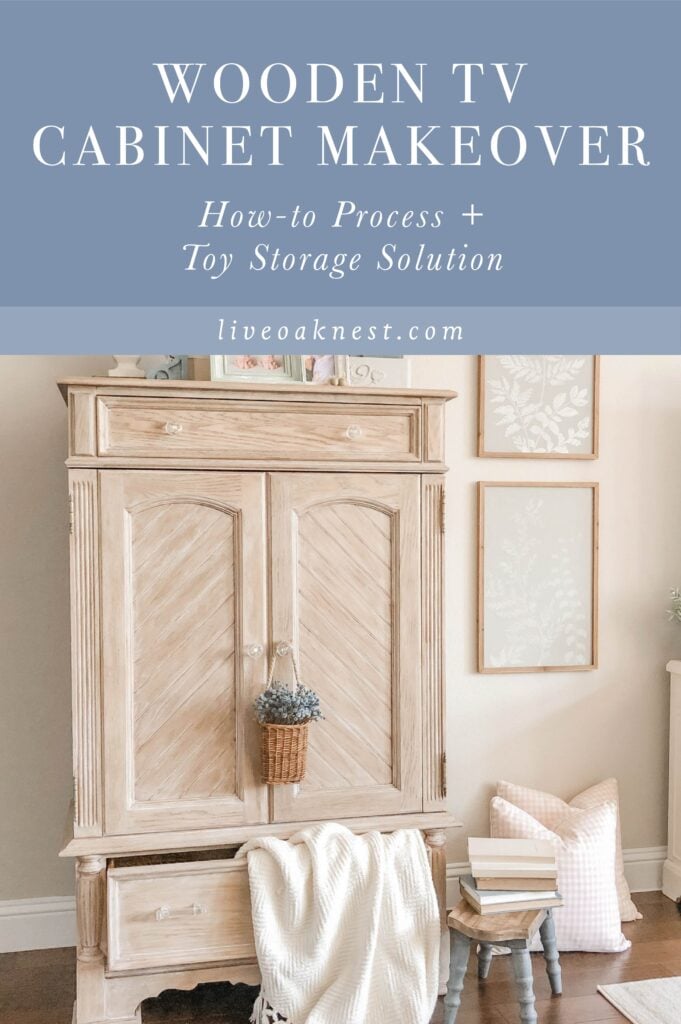
Come see my old wooden TV cabinet makeover. This project turned out SO good and it is the perfect DIY toy storage cabinet for decluttering!

Hi there! I hope you have a fun weekend planned! Before we get into today’s post….did you see my small porch refresh? I did a few flower pot makeovers and I think they turned out so pretty! If you’re looking to put a fresh coat of paint on your planters or add some beautiful details to your terra cotta pots, click on over to read the post!
TV Wooden Cabinet Makeover
I’m so excited to share this project with yall today. It’s one of my top favorite furniture makeovers for sure!
Our living, kitchen, and dining rooms are all downstairs, and everything else is upstairs in our townhome. We spend most of our time downstairs and space is limited, so when the twins started crawling around and playing I knew I needed to figure out a toy storage solution pretty quick! I didn’t want to spend a lot of money, and I needed something a pretty good size.
Facebook Marketplace is always my first stop when I’m looking for a project piece. I started my search looking for a cabinet or dresser that would fit my space. Old, wooden TV cabinets kept populating in my search and I decided I could make one over and turn it into the perfect toy storage solution!
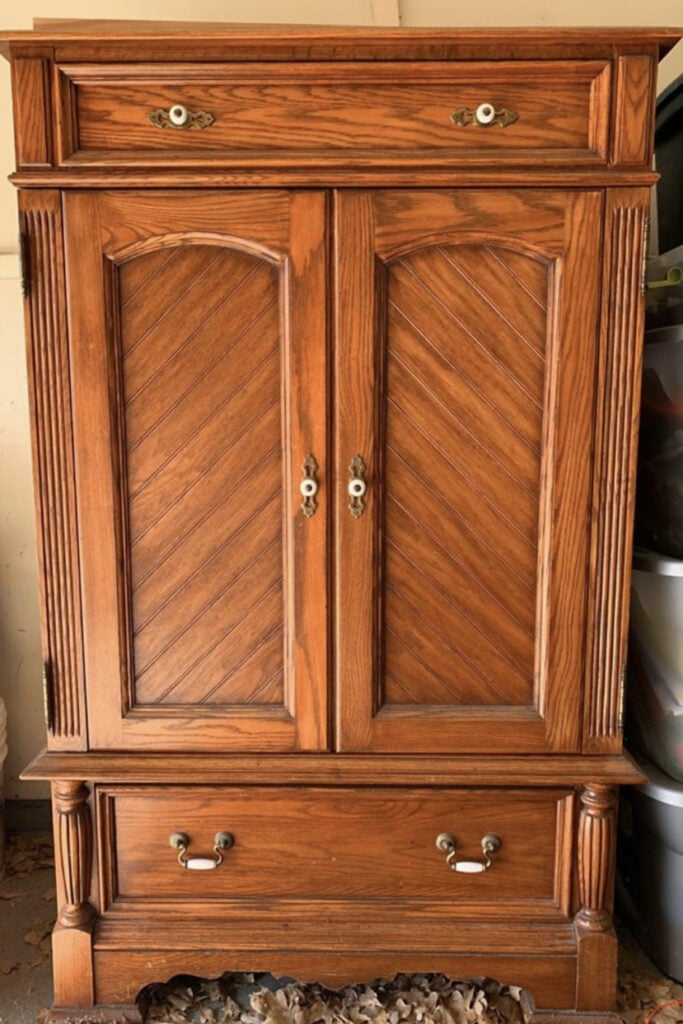
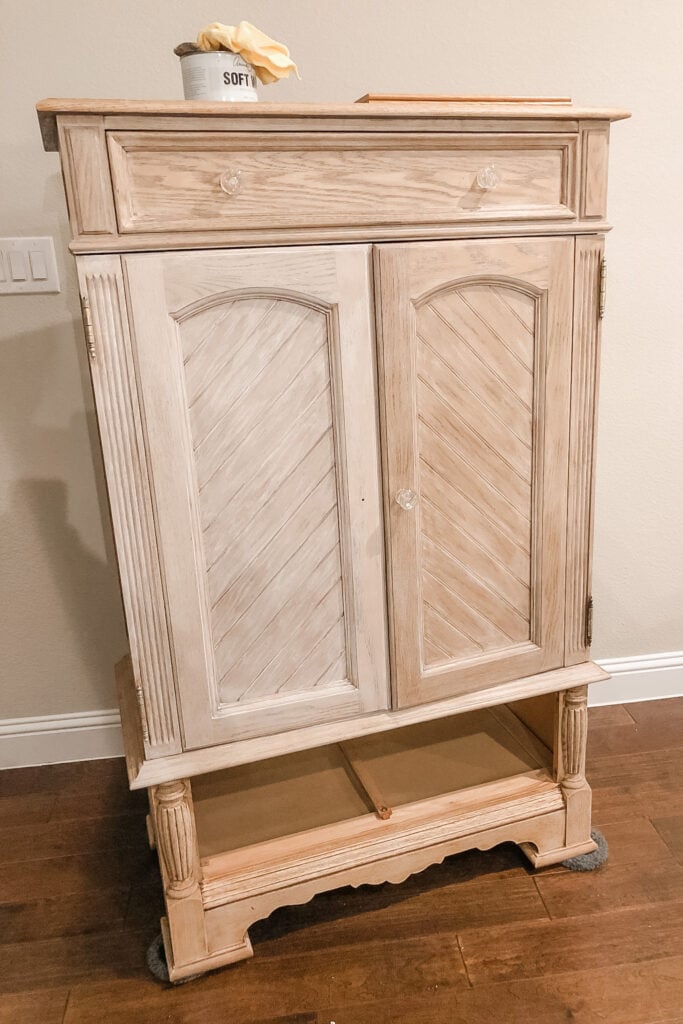
Without further ado, here is the old tv wooden cabinet that made it’s way into my home! I grabbed this beauty off of Facebook Marketplace for $40. It is made from oak wood and is really good and solid. The arched detailing on the doors, the drawers, and the size were the things that drew me to this piece.
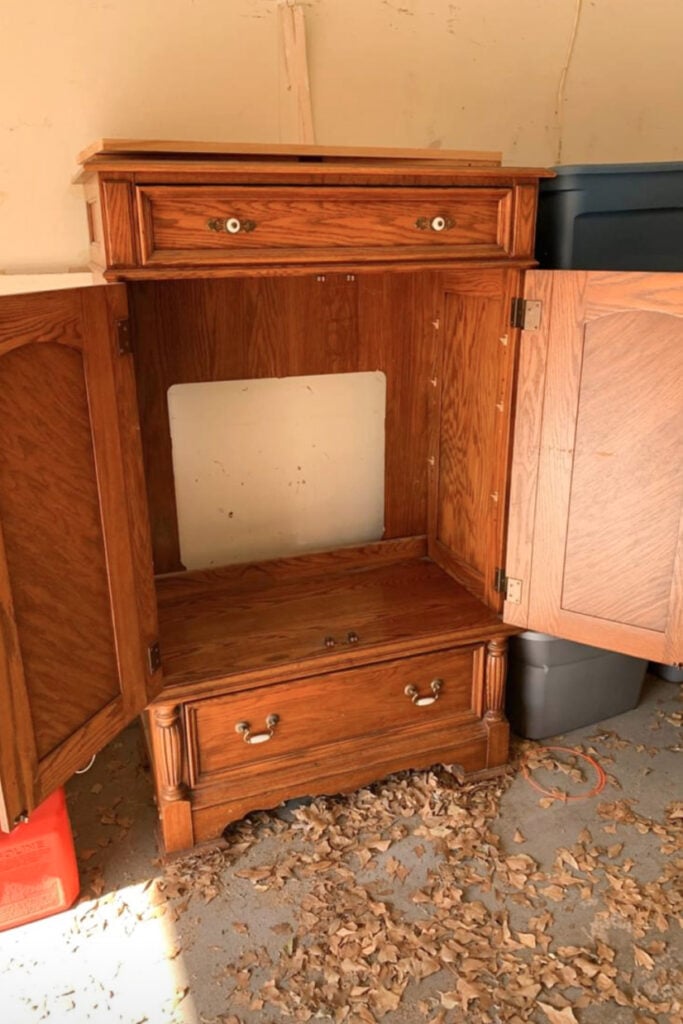
The first thing we did was pull the particle board backing off. It had a big cut out for the TV, and I wanted to replace it with a solid piece so toys couldn’t fall out of the back. I also unscrewed the electrical outlet that was originally used to plug in the TV.
TV Wooden Cabinet Makeover
Sanding Wood Furniture
Next, I decided on the finish I wanted this piece to have. I have a lot of painted furniture in my home, so I decided I wanted to strip this one down and leave it a wood tone. I started trying to remove the stain and varnish by testing a side with Citristrip. Unfortunately, it wasn’t lifting very easily, so I decided to sand it. Knowing what I know now, I would recommend purchasing a soda blaster. It would have saved me days of work and sore fingers for weeks. HAHA
But, I didn’t know about soda blasters so I hand sanded this ole’ gal! I used 80 grit sandpaper to remove the varnish and stain, and then went back in with 120 grit to smooth everything down. I also used a this Dremel with a sanding attachment to help me remove some of the varnish and color that was deep inside the nooks and crannies.
TV Wooden Cabinet Makeover
Bleaching Wood
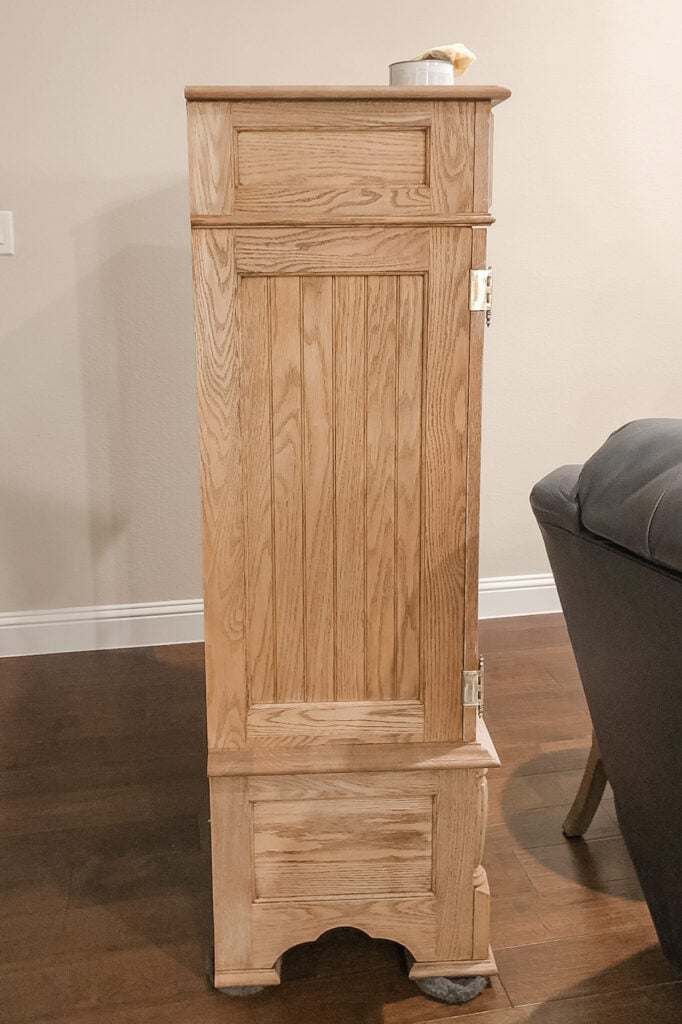
Once I had all of the varnish and stain removed, I bleached it. I took normal household bleach, and brushed it on with an old paintbrush, and then let it sit and dry in the sun. It took about 3 rounds of the bleaching to pull out enough of the orange/yellow undertones. To complete the bleaching process, you want to wipe your piece down with a vinegar/water solution to neutralize the bleach. I did about 3 cups of water to 1 cup of vinegar. This is how the raw wood looked after bleaching.
How To Achieve A Whitewashed, Bleached Effect
For this particular piece, I applied a really good coat of liming wax. But it didn’t take long to see it was going to look too white; not the look I was going for. The left door here only has lime wax on. The right side has lime wax with dark wax layered over it. The very bottom is still raw wood.
So then I added on a layer of dark wax, being careful not to rub it down into all the nooks. I wanted to make sure the liming wax, which is white, stayed visible and settled into the grooves. I love using these microfiber towels to apply wax to furniture.


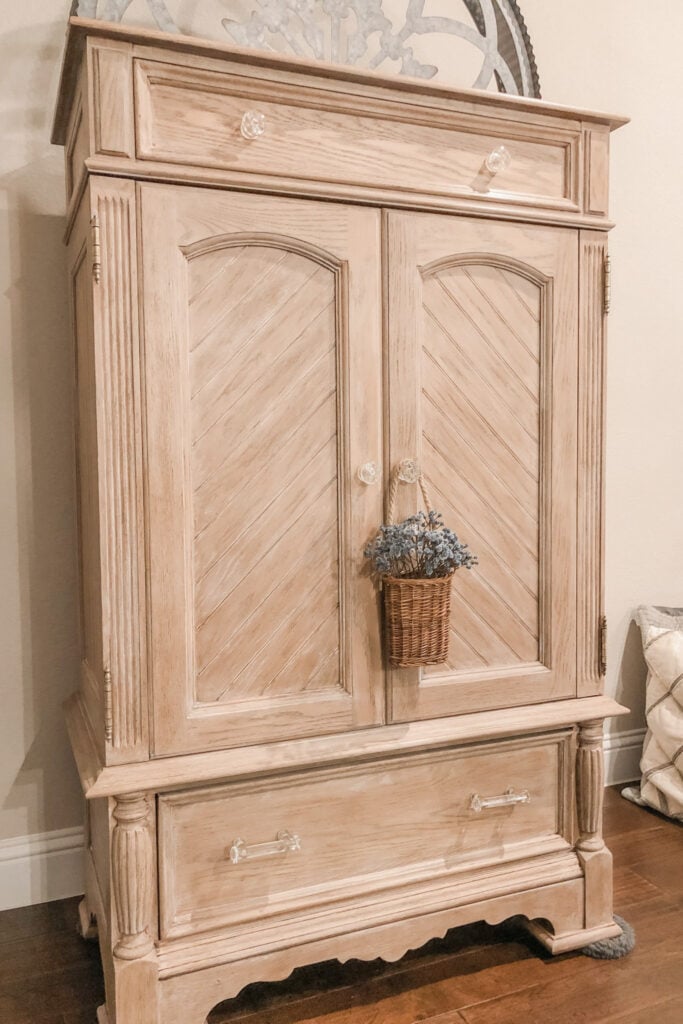
This is the completed look! I liked the original knobs but ended up replacing them with these glass chunky knobs from Hobby Lobby. Aren’t these knobs so pretty?! I have these or something very similar on several pieces of furniture in the house.
TV Wooden Cabinet MAkeover
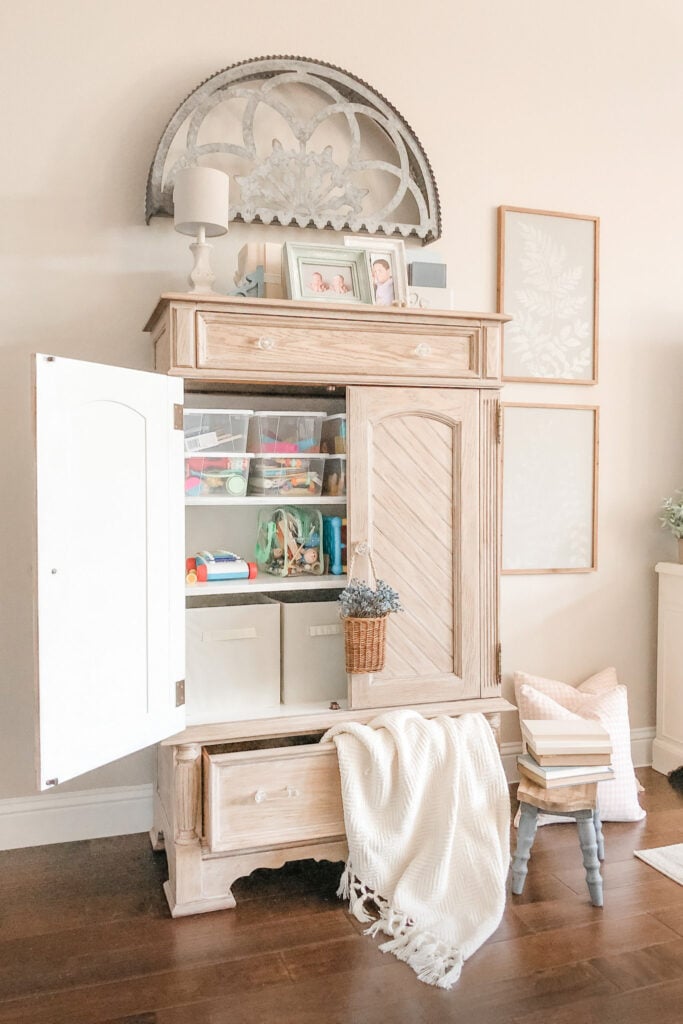
Toy Storage
Once the outside was finished, we tacked new particle board to the back. I painted the inside white to freshen it up. To organize all the kids toys, I purchased these storage cubes, and these plastic bins. Almost all of the toys fit in this cabinet and everything has a place. I love having all the toys tucked away and as the kids have gotten older they know where things go.
So just as a recap, here is what this old wooden tv cabinet looked like when I picked it up.
And here is the after! My TV wooden cabinet makeover!
What do you think? Do you like how I made this over? I did upload some stories over on Instagram as I worked on this piece, and you can watch those here.
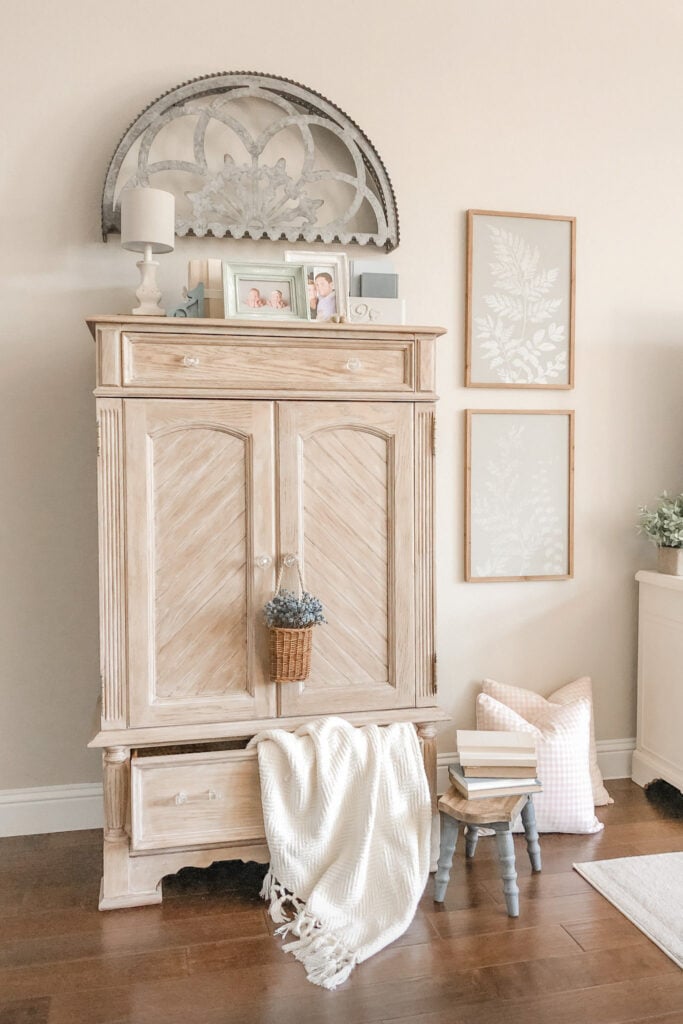
I love redoing furniture and taking a piece that might end up in the trash and giving it a new home! If you want to see how I have this cabinet decorated now, click here to see it in my French Cottage Farmhouse Spring Home Tour.
I’d love for you to say hello down below and let me know what you think! And if we’re not friends over on Facebook or Instagram, what are you waiting for?! ☺️
Are you on Pinterest? Come follow along for more home decor inspiration.
Blessings,
Kayla C.
You Might Also Enjoy

Shop This Post


Gorgeous! You did an awesome job! So sorry for your sore fingers but looks like it was so worth it.
Hi! Thanks so much! The fingers recovered and I agree….worth it!! 🙂
Beautiful transformation and inspiring for me to get busy! The before and after are remarkable. Thanks for the step by step.
Hi Beth! Thank you so much! So glad you enjoyed this project!
Love how this turned out and it’s a great storage solution. I have absolutely no storage in my house and I have to get creative and make all my furniture do double duty. I’ve been thinking of taking an armoire or tv cabinet and doing something just like this with added shelves inside, for storing my extra blankets and sheets. My tiny little linen closet barely holds some towels!
Thanks Tara! Yes, such a great storage solution. And it actually holds A LOT of toys! Would hold a lot of linens too!
Do you think this would look good on my kitchen cabinets???
Hi Julie! I think it would be pretty depending on how many cabinets you have, but I would stay away from Wax on kitchen cabinets. I don’t think it would hold up to your liking over time! (The white and brown wax is what I used to put over the raw wood.) You might consider Gel Stains or painting them with chalk paint and then sealing! I use Jolie Chalk Paint and LOVE it! https://joliehome.com?aff=159